Create custom Widget

On this tutorial, I will show you how to create a custom Widget with PHP code, it’s pretty simple.
First step, open “Theme Editor” plugin, if you don’t have, you can install it from plugin repository.
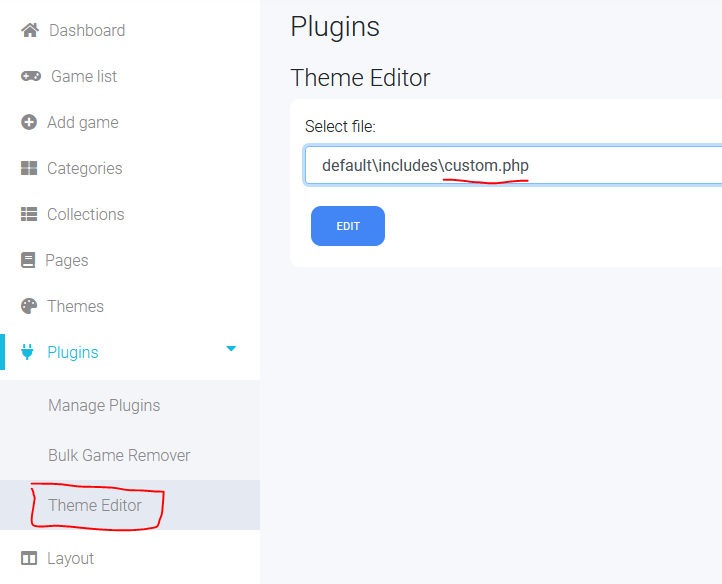
Select “custom.php” file, then click EDIT. Is recommended to always put custom PHP script or widgets on custom.php since custom.php will not overridden during theme update.
You will see this:

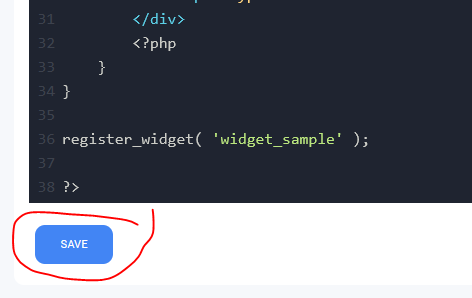
Put code below inside php tag:
class widget_sample extends Widget {
	function __construct() {
 		$this->name = 'Sample Widget';
 		$this->id_base = 'sample-widget';
 		$this->description = 'This is sample Widget.';
	}
	public function widget( $instance, $args = array() ){
		$html = isset($instance['html-sample']) ? $instance['html-sample'] : '';
		echo "<h3>$html</h3>";
	}

	public function form( $instance = array() ){

		if(!isset( $instance['html-sample'] )){
			$instance['html-sample'] = '';
		}
		?>
		<div class="form-group">
			<label><?php _e('Test form') ?>:</label>
			<input type="text" class="form-control" name="html-sample" value="<?php echo $instance['html-sample'] ?>">
		</div>
		<?php
	}
}

register_widget( 'widget_sample' );
Explainer:
- Line 2: widget child, you can replace “widget_sample” with your widget name (lowercase, alphabet characters, no space), make sure it’s unique
- Line 4-6: Widget details, name & id_base must be unique
- Line 8: widget() is called on theme code or visitor page also can be called renderer
- Line 9: If $instance[‘html-sample’] is exist, store the value to $html, if not, put empty string instead.
- Line 10: Show $html
- Line 13: form() is called on admin panel “Layout > Widgets”, we can put widget configuration script here
- Line 15-17: Set $instance[‘html-sample’] to empty string if not exist
- Line 19-22: Widget configuration form
- Line 21: Make sure input name is same with instance name, on this sample: name=”html-sample”
- Line 26: Register the widget, if this fuction not called, your widget won’t be loaded.
Then save it
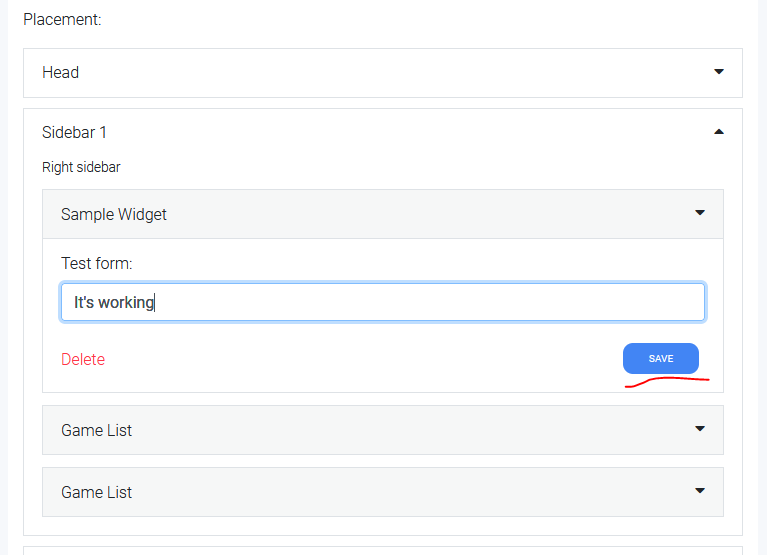
Now you can visit “Layout > Widgets” page, you will see new widget you just created.
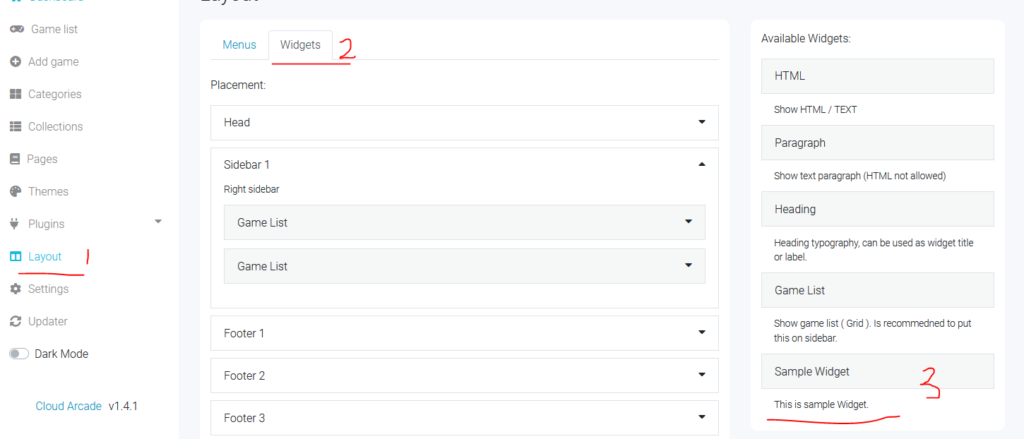
Drag and drop “Sample Widget” into “Sidebar 1” widget placement. Fill the input field, then click save
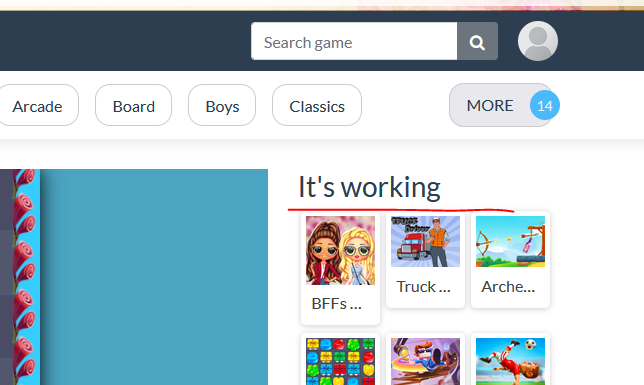
Here is the result on game page sidebar:
You can also using built-in functions or get current page object and variables on widget()
Sample code:
class widget_sample extends Widget {
	function __construct() {
 		$this->name = 'Sample Widget';
 		$this->id_base = 'sample-widget';
 		$this->description = 'This is sample Widget.';
	}
	public function widget( $instance, $args = array() ){
		global $custom_path;
		global $game;
		if($custom_path == 'game'){ // Check if real page name is "game"
			echo '<h3>Current game is: '.$game->title.'</h3>';
			echo '<p>This game have '.$game->upvote.' likes</p>';
		} else {
			echo 'This widget only work on game page';
		}
	}
	public function form( $instance = array() ){
		//
	}
}

register_widget( 'widget_sample' );
don’t forget to put “global” type on global variable.
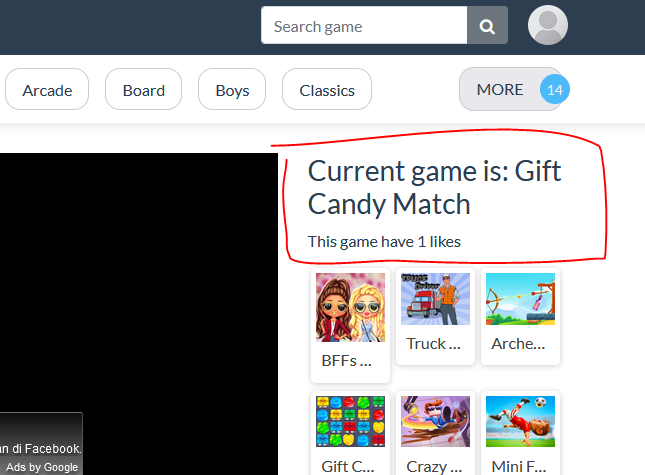
Result:
Advanced
Create a new Widget placement
Put code below inside custom.php
register_sidebar(array(
	'name' => 'New Placement',
	'id' => 'new-placement',
	'description' => 'Sample Placement.',
));
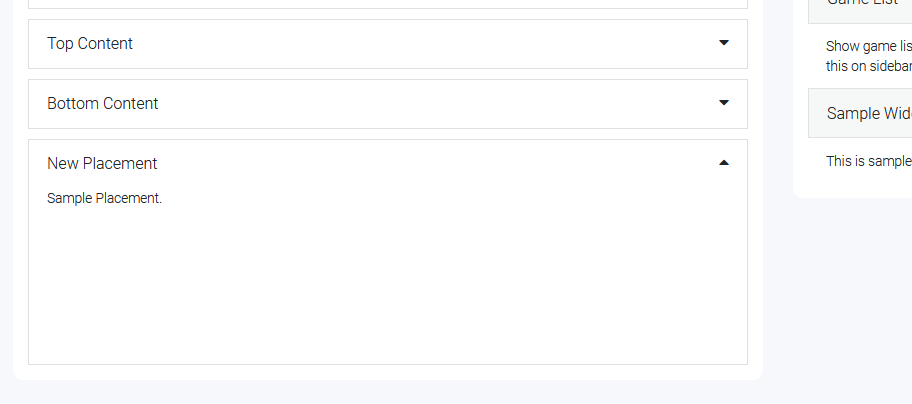
Result:
Now you can put widgets on your new placement
Then put this code on your theme code to show the widget placement:
<?php widget_aside('new-placement') ?>